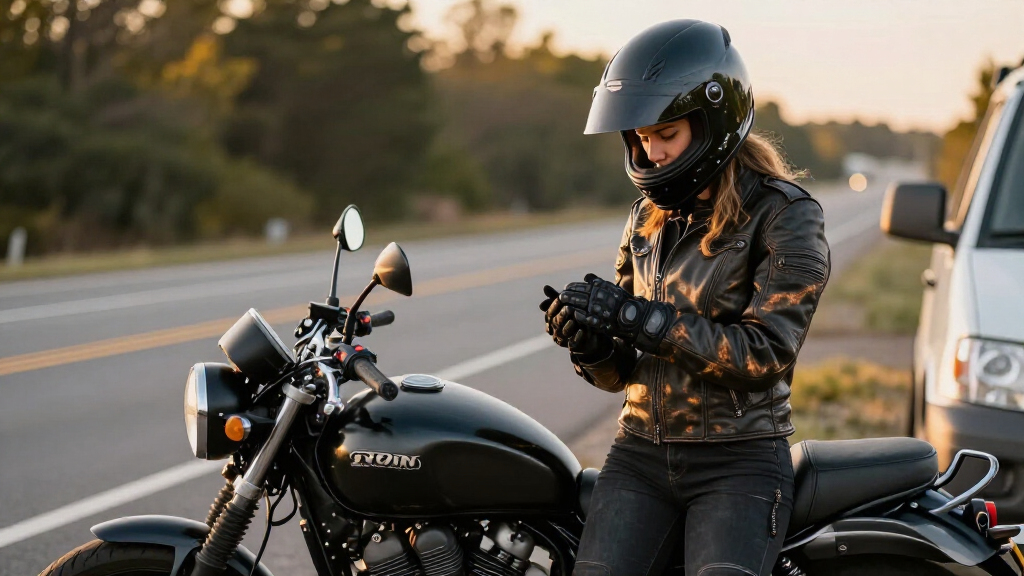
This guide helps new and returning riders assemble and wear a protective set of motorcycle gear: helmet, jacket, pants, gloves, and boots. You will learn how to check fit, match gear to riding conditions, and inspect it before riding. It is written for beginners and takes about 30-60 minutes to choose and fit a set you already have access to; allow more time if you need to shop or compare sizes.

Get garage and car supplies delivered free — and shop member deals
- Fast, free delivery on millions of items
- Access to Prime Big Deal Days deals on October 6–7
- Prime Video, Amazon Music and more included

iXS Pacora-ST Tour Waterproof Motorcycle Jacket
- ✔ Fabric: 100% polyester
- ✔ Weather protection: Waterproof and windproof membrane
- ✔ Breathability: Breathable membrane

Nomad Waterproof Reflective Motorcycle Rain Suit, 2-Piece
- ✔ Material: 600D polyester with PU coating
- ✔ Pieces: 2
- ✔ Weather protection: Designed to be waterproof and windproof

Scoyco CE Level 1 Motorcycle Knee and Shin Guards
- ✔ Certification: CE Level 1; EN 1621-1:2012 impact test
- ✔ Shell: 3 mm TPU
- ✔ Construction: Dual-density foam and reinforced core
Difficulty: Beginner | Time: 30-60 minutes to select and fit gear; 5 minutes before each ride
What You’ll Need
Tools & Materials:
- Motorcycle helmet with an intact label and manufacturer instructions
- Motorcycle jacket and riding pants with protective armor
- Motorcycle gloves
- Over-the-ankle motorcycle boots
- Full-length mirror, if available
- Measuring tape, if shopping for gear
Knowledge:
- Basic awareness of your motorcycle, riding position, and expected weather
- Ability to fasten zippers, closures, and helmet retention straps
Check the helmet requirements and safety standards for your location. Choose motorcycle-specific protective equipment and follow its care instructions. Gear reduces injury risk but cannot prevent every injury. Do not ride in gear that is damaged, loose enough to shift, or too restrictive for safe control.
iXS Pacora-ST Tour Waterproof Motorcycle Jacket
The iXS Pacora-ST is our strongest all-around pick when we want one jacket for changing touring conditions. Its waterproof, windproof, breathable membrane addresses weather exposure, while front and back ventilation panels offer a way to promote airflow when conditions warm up. That combination gives it an advantage over the Nomad suit as a single garment for regular use: the Nomad is designed as a two-piece rain layer, whereas the iXS is explicitly a touring jacket.Fit adjustment is another useful distinction. Adjustable cuffs, waist, and arm straps help us tailor the jacket over riding layers, and multiple secure zippered pockets provide storage for small essentials. Those are practical touring details, not just a feature list: a more controlled fit can help reduce shifting, and zippered storage is useful when we want items secured while riding. The jacket’s hand-wash-only care is less convenient than the machine-washable Nomad suit.We should not treat its weather features as proof of impact protection. No specific armor details are provided, so riders seeking a jacket with confirmed impact armor should verify the configuration before buying or plan for compatible protective equipment. Compared with the Scoyco guards, the iXS offers broader garment coverage but lacks the guards’ stated CE Level 1 certification. It makes the most sense for touring-focused weather coverage, not as a verified complete protective system.
Pros:
- Waterproof and windproof membrane is designed for changeable weather.
- Front and back ventilation panels promote airflow.
- Adjustable cuffs, waist, and arm straps help tailor the fit.
- Multiple zippered pockets secure small essentials.
Cons:
- Hand-wash-only care is less convenient than the Nomad suit’s listed machine washing.
- The description provides no specific armor details.
Best for: Touring riders who want a weather-protective jacket with ventilation, adjustable fit, and secure pockets.
Not ideal for: Riders who require clearly specified built-in impact armor, or who want a machine-washable garment.
Bottom line: Choose the iXS for the most balanced touring-focused weather features in this lineup, but verify impact protection separately.
“Choose the iXS for the most balanced touring-focused weather features in this lineup, but verify impact protection separately.”
Nomad Waterproof Reflective Motorcycle Rain Suit, 2-Piece
The Nomad suit is the lineup’s dedicated wet-weather layer. Its two-piece design covers both upper and lower body, making it a more direct choice for rain coverage than the iXS jacket alone. The 600D polyester with PU coating is described as waterproof and windproof, and adjustable cuffs and waist let riders tune the fit over clothing. Pant stirrups are intended to help keep the legs in place, an especially useful detail when the suit is worn over other layers.Visibility and versatility distinguish it from the other picks. Reflective piping adds a visibility feature that the iXS description does not mention, and the suit is presented for other outdoor activities as well as motorcycling. Two front pockets offer basic storage, though the iXS has multiple zippered pockets specifically described as secure. Color options include orange/black and green/black alongside darker combinations, giving buyers alternatives to an all-dark setup.We rank it behind the iXS because it is more specialized: a rain suit is useful when we need extra coverage, but it does not replace a touring jacket or establish impact protection. The adjustable hood may be practical off the bike, but riders should consider how it fits with a helmet and riding posture. Also, no independent performance details are provided, so the waterproof claim should not be confused with documented performance under particular conditions. Choose it as a weather layer, not as a complete motorcycle protection solution.
Pros:
- Two-piece format offers rain coverage for both upper and lower body.
- Waterproof and windproof construction is specified.
- Reflective piping adds a visibility-oriented detail.
- Adjustable waist and cuffs plus pant stirrups support a more secure fit.
Cons:
- No independent performance details are provided.
- The description does not specify impact armor or certification.
- The adjustable hood may require consideration around a helmet.
Best for: Riders who want a separate two-piece layer for rain and wind coverage over their usual riding clothes.
Not ideal for: Anyone seeking a single touring jacket with stated ventilation, or gear with specified impact armor.
Bottom line: Pick the Nomad when added rain coverage matters more than the touring ventilation and pocket details of the iXS jacket.
“Pick the Nomad when added rain coverage matters more than the touring ventilation and pocket details of the iXS jacket.”
Scoyco CE Level 1 Motorcycle Knee and Shin Guards
The Scoyco guards are the only pick here with a stated impact-protection certification: CE Level 1 under EN 1621-1:2012. That makes them the clear choice for riders specifically seeking knee and lower-leg protection, rather than another layer against weather. Their 3 mm TPU shell, dual-density foam, and reinforced core are described as impact-absorbing construction, while widened calf coverage extends protection below the knee.Articulation is central to their riding use. The guards bend from 45° to 180°, and adjustable elastic bands with Velcro straps are intended to help keep them positioned as the knee moves. Compared with the iXS jacket and Nomad suit, this is a much narrower piece of kit: it does not provide torso coverage, weather protection, or pockets. But for the specific job of protecting knees and shins, it has the strongest stated protection credentials in the group.There are practical limits. These are two separate guards, so riders need to assess fit and compatibility with their clothing and riding position. They are cleaned with a damp, soft towel and must not be machine washed; the listing also states there is no warranty. Certification applies to the guards’ specified impact-protection role, not to a full riding outfit or every kind of injury. We rank them third overall because of their specialized coverage, while considering them the first choice for buyers whose priority is certified knee and shin protection.
Pros:
- CE Level 1 certification is stated, with EN 1621-1:2012 impact testing.
- Articulated design bends from 45° to 180° for knee movement.
- Adjustable elastic bands and Velcro straps help secure the guards.
- Widened coverage protects the knee and lower leg.
Cons:
- Covers only the knees and lower legs, unlike the garments in this roundup.
- Cannot be machine washed and requires surface wiping.
- No warranty is listed.
Best for: Adult riders seeking CE Level 1-certified knee and lower-leg guards with an articulated design.
Not ideal for: Riders looking for all-weather clothing, torso coverage, or a complete protective outfit in one purchase.
Bottom line: Choose the Scoyco guards when certified knee and shin coverage is the priority, while treating them as one part of a broader riding kit.
“Choose the Scoyco guards when certified knee and shin coverage is the priority, while treating them as one part of a broader riding kit.”
As an Amazon Associate we earn from qualifying purchases.
Before You Start
Set out the full gear set and try it on while standing, then sit in your usual riding position. If buying, measure yourself and use each manufacturer’s size chart; sizing differs between brands. Check weather, ride length, and whether your route includes rain or cold. Protective gear should stay in place while you move, without restricting breathing, vision, circulation, or control operation. Do not use a helmet that has been in a crash or has unknown impact history.
Step-by-Step Instructions
Step 1: Choose gear for the ride
Select motorcycle-specific gear rather than ordinary clothing. Choose a jacket and pants with impact armor at the knees and elbows, plus shoulder and hip protection where supplied. Look for abrasion-resistant construction and secure closures. Pick gloves that cover the wrists and boots that cover the ankles and fasten securely. Wear weather-appropriate layers underneath without making the fit tight.
Tip:Ventilation, waterproofing, and insulation address comfort, but do not replace impact and abrasion protection. For changing conditions, consider removable liners or a separate waterproof layer designed to fit over your protective gear.
Check: You have a full set of motorcycle-specific gear that covers your body and suits the expected weather and ride.
Step 2: Check the helmet condition and fit
Inspect the shell, visor, lining, and retention strap for cracks, damage, loose parts, or wear. Confirm the helmet meets the safety standard required where you ride and is the right size. Put it on straight, fasten the strap, and check that it sits level and low enough to protect your forehead. Check that the fit is snug and even, without painful pressure points. Move the helmet gently from side to side and up and down; your skin should move with it rather than the helmet sliding freely.
Tip:Do not buy a helmet that is loose in hopes that padding will make it fit later. Follow the maker’s instructions for sizing, care, and replacement. Replace a helmet after an impact, even if visible damage is absent.
Check: The helmet stays in place during gentle movement, the strap is fastened, and you can see clearly through the visor without obstruction.
Step 3: Fit the jacket and armor
Put on the jacket and close every zipper, snap, and adjustment tab. Check that the shoulder and elbow armor sits over the joints when your arms are relaxed. Bend your elbows and reach forward as if holding the handlebars. Confirm the sleeves do not ride up and expose your wrists, and that the jacket does not pull so tightly that you cannot move or breathe comfortably. Adjust the cuffs and waist to limit shifting.
Tip:Try the jacket in your normal riding posture. A jacket that fits while standing may pull across the shoulders or move the armor when you lean forward.
Check: The jacket stays closed and the armor remains centered over your shoulders and elbows as you reach forward.
Step 4: Fit the pants and knee protection
Put on the riding pants and fasten them as intended. Sit in a riding position and bend your knees. Check that the knee armor covers your kneecaps and stays in place, and that the pants do not pull up enough to expose your lower legs. Confirm the waist and closures remain secure when seated. If the pants connect to the jacket, attach the connection as directed by the manufacturer.
Tip:Use riding pants rather than assuming ordinary jeans provide equivalent abrasion protection. If armor is adjustable, set it while seated, then stand and check that it has not shifted.
Check: The pants remain secure in riding posture, and the knee protection covers the intended area without restricting movement.
Step 5: Put on gloves and boots
Pull on the gloves and secure their closures. Check that they cover the wrists and do not interfere with operating the throttle, brake, clutch, switches, or other controls. Put on boots that cover the ankles, then close their zippers, straps, or laces securely. Tuck loose laces away from moving parts. While seated, place both feet on the controls or footrests and check that the boots do not catch or prevent you from moving your feet.
Tip:Test the controls while the motorcycle is stationary, with the engine off if practical. Gloves that bunch at the fingertips or boots with loose laces can interfere with operation.
Check: Your hands can operate each control smoothly, and your boots stay fastened without catching on the motorcycle.
Step 6: Complete a full movement and visibility check
Wear the entire set and sit on the stationary motorcycle. Turn your head both ways, look over each shoulder, reach for the controls, bend your knees, and move your feet between the footrests and controls. Check that the helmet does not block your field of view, clothing does not restrict movement, and armor remains over the joints. Confirm every closure is fastened and no layer is exposed where it should be covered.
Tip:Ask another person to look at the armor placement while you sit in riding posture if you cannot see it clearly. Reposition any protector that shifts, then repeat the movement check.
Check: You can move, see, and reach the controls normally, and all protective pieces stay in position.
Step 7: Inspect the gear before each ride
Before setting off, check the helmet and visor, fasten the chin strap, close jacket and pants, and secure glove and boot closures. Look for damage, missing armor, or loose straps. Remove dirt or debris that could interfere with closures or vision. If a zipper, strap, or protective component is damaged, replace or repair it according to the manufacturer’s instructions before riding.
Tip:Make this a repeatable pre-ride check rather than relying on memory. Gear can shift or become damaged between rides, especially after a fall or hard impact.
Check: The helmet is secured, all clothing closures are fastened, armor is present and correctly placed, and nothing obstructs your vision or control use.
Common Mistakes to Avoid
- Choosing gear by casual standing fit alone. — Test the full set while seated in riding posture, moving your arms and legs as you would on the motorcycle. Confirm armor stays over the joints.
- Wearing a loose helmet or leaving its strap unfastened. — Use the maker’s sizing guidance, perform the movement fit check, and fasten the retention strap every ride. Replace a helmet after an impact.
- Using everyday gloves, shoes, or jeans as substitutes for riding gear. — Choose motorcycle-specific items with secure closures and appropriate coverage. Ordinary clothing may not stay in place or provide comparable protection.
- Ignoring damaged closures, displaced armor, or loose laces. — Inspect the set before riding, secure every closure, tuck away laces, and repair or replace damaged gear before use.
Troubleshooting
Problem: The helmet feels painful, creates a strong pressure point, or slides when you move.
Solution: Take it off and recheck the size and shape guidance from the manufacturer. Try another size or model rather than loosening the fit or modifying the helmet. Seek help from a qualified helmet retailer if fit remains uncertain.
Problem: Armor shifts away from a knee, elbow, or shoulder in riding posture.
Solution: Adjust the armor pockets or straps according to the gear instructions, then repeat the seated movement check. If it still shifts, try a different size or cut that holds the protectors in place.
Problem: Gloves make the controls hard to operate.
Solution: Check that the gloves are the correct size and that their seams or padding do not bunch at your fingertips. Try a different model, then retest every control while stationary before riding.
Problem: The jacket or pants feel restrictive after all layers are on.
Solution: Remove a bulky layer or choose a larger or differently shaped garment, then recheck armor placement. Do not ride if the fit limits breathing, movement, or control operation.
What Success Looks Like
Your complete set covers your head, torso, arms, legs, hands, and ankles with motorcycle-specific protective gear. The helmet is undamaged, correctly fitted, and fastened. Armor covers the intended joints and stays put in riding posture. Closures remain secure, vision is clear, and you can operate all controls and move freely. You have checked the set for damage before riding.
Next Steps
Follow each item’s care label and manufacturer instructions for cleaning, drying, storage, and replacement. Recheck fit as your body, layers, or gear change, and inspect after a fall or impact. Replace damaged equipment; do not assume a helmet or protector remains safe because it looks intact. Before a longer ride, wear the complete set during a short stationary practice session and confirm that it remains comfortable and secure.
Frequently Asked Questions
Do I need motorcycle-specific pants if I already wear jeans?
Ordinary jeans may not provide the abrasion resistance, secure fit, or impact armor of motorcycle riding pants. Use purpose-made riding pants with protective features suited to your riding, and check their fit in a seated position.
How tight should a motorcycle helmet fit?
It should feel snug and even without painful pressure points. When you move the helmet gently, your skin should move with it rather than the helmet sliding freely. Follow the manufacturer’s fit instructions and use the correct retention system.
Can I wear my jacket over a backpack or thick layers?
Extra layers must not make the jacket restrictive or move its armor away from the joints. Check the fit with everything you plan to wear, seated in riding posture. Avoid carrying straps or loose material in a way that could interfere with controls or safety equipment.
When should I replace motorcycle riding gear?
Replace items that are damaged, have failed closures, missing protectors, or compromised construction. Replace a helmet after an impact, even if it appears undamaged, and follow the maker’s guidance for service life and care.
Halloween Picks
halloween
As an affiliate, we earn on qualifying purchases.