TL;DR

Get garage and car supplies delivered free — and shop member deals
- Fast, free delivery on millions of items
- Access to Prime Big Deal Days deals on October 6–7
- Prime Video, Amazon Music and more included
Motorcycle riding gear protects you from impact, abrasion, weather, and poor visibility, but it only works well when each piece fits and suits the ride. Start with a certified, well-fitting helmet, then add abrasion-resistant clothing with armor, protective gloves, and sturdy boots; check gear regularly and replace helmets after a crash.
A short ride can turn into a long slide in the blink of an eye. You might leave home under blue skies, then meet gravel in a corner or rain on the highway before you reach the next town. The right motorcycle riding gear gives you a protective layer between your body and those surprises.
This guide explains how to choose the gear that matters most, what a good fit feels like, and how to dress for changing weather without turning your commute into a sweaty wrestling match. You’ll also get a practical buying order and answers to common questions from readers, so you can spend your money where it helps most.
Choose a certified helmet that fits evenly and stays level; replace it after a crash or significant impact.
Wear abrasion-resistant jacket and pants with armor that stays over your joints in riding position.
Pick gloves for secure grip and control feel, and boots with ankle coverage, secure closures, and grippy soles.
Use layers for changing weather without pushing armor out of place, and add bright or reflective details for visibility.
Inspect seams, closures, armor, soles, and straps regularly; follow each manufacturer’s care and replacement advice.
Start with a helmet that fits and meets a recognized standard
Motorcycle riding gear starts with a helmet that fits snugly and carries a recognized safety certification. A full-face helmet covers your head, chin, and face, so it offers more coverage than an open-face or half helmet. Look for the certification required where you ride, such as DOT in the United States or ECE in markets that use that standard. A label indicates the helmet was tested to a defined standard; it does not guarantee that every model offers identical coverage or that a poorly fitted helmet will protect you as intended.
Fit matters because a helmet needs to stay in the right position during a ride and impact. It should sit level, feel evenly snug around your head, and resist rolling when you gently move it side to side; it should not create sharp pressure points. For example, if it feels comfortable in the shop but leaves a hot spot on your forehead after ten minutes, try a different shape rather than assuming the padding will fix everything. A helmet that is too loose can shift and expose parts of your head, while one that is painfully tight is unlikely to be tolerable on longer rides.
Full-face helmets generally cover more of your face, but comfort, visibility, ventilation, and the right fit affect whether you’ll wear yours on every ride. A modular helmet can make stops easier, while an open-face model gives you more airflow but less facial coverage. Those are real tradeoffs: convenient access or airflow does not replace the protection provided by a chin bar. Treat a helmet like a well-fitted lid, not a fashion accessory: it needs to stay in place when the wind pushes at it.
Replace a helmet after a crash or significant impact, even if the shell looks fine. The impact-absorbing material inside can be compressed without obvious external damage, so appearance alone cannot tell you whether it still works as intended. Follow the manufacturer’s care and replacement advice, since materials and service life differ. In the United States, check the NHTSA recall database by helmet make and model before buying or riding with older equipment. A scratched visor can also turn sunset glare into a smeared wall of light, so replace damaged parts with approved components.
Buy for fit and certification first; color and extras come after protection and coverage.
DOT certified full face motorcycle helmet
As an affiliate, we earn on qualifying purchases.
As an affiliate, we earn on qualifying purchases.
Build a jacket-and-pants setup that protects more than your torso
Motorcycle riding gear should cover your body from shoulder to ankle with abrasion-resistant material and correctly placed armor. A jacket can protect your back and arms, but everyday jeans usually leave your hips and knees less protected than motorcycle-specific riding pants. In a slide, clothing has to resist wearing through long enough to keep skin from contacting the road; a gap or weak area can make an otherwise protective outfit much less useful.
Leather and textile each bring tradeoffs. Leather is durable and can offer strong abrasion resistance, while modern textile jackets often add vents, weatherproof liners, and pockets for removable armor. Neither material makes every garment equally protective, so check its construction, armor placement, and the garment’s safety labeling instead of judging by thickness or price alone. A lighter, ventilated garment may be more comfortable in heat, but ventilation should not come at the cost of exposed areas or armor that moves out of position.
For instance, a rider commuting across town might choose an armored textile jacket and riding jeans with knee and hip protection. On a summer back road, large mesh panels can help airflow, but they should still sit over protective material and armor—not leave your shoulders or elbows exposed. Armor helps manage impact at vulnerable joints, but only if it stays aligned when you move. Armor should stay over the joint when you bend your arms or knees, rather than sliding toward your wrist or thigh.
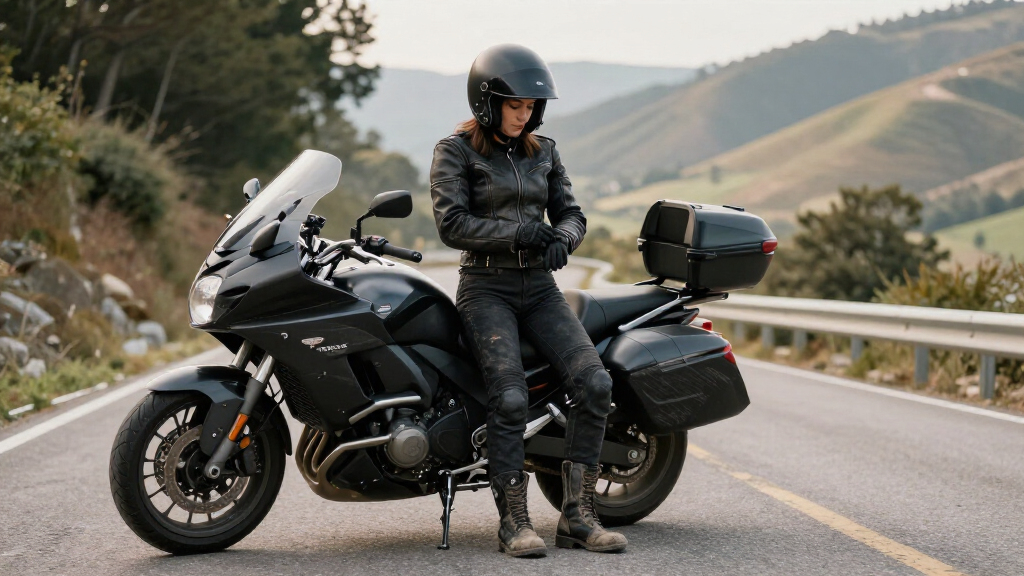
Try jackets and pants in a riding position: lean forward, reach for imaginary handlebars, and sit as you would on your bike. Sleeves and legs should still cover your skin, and closures should not pull open. If the clothing fits only while standing upright, wind and riding posture may pull it away from the areas it is meant to cover. If you tour in colder weather, use a thermal layer under the protective garment; avoid adding bulky layers that change the fit or push armor out of place. Those small fit checks make the gear work as a system instead of a collection of good intentions.
abrasion resistant motorcycle jacket with armor
As an affiliate, we earn on qualifying purchases.
As an affiliate, we earn on qualifying purchases.
Choose gloves and boots that stay useful when the road gets rough
Gloves and boots protect the parts you instinctively put out first when you lose balance: your hands and feet. They also affect the controls you use to stay in command of the bike. Good gloves combine a secure fit, abrasion-resistant construction, palm reinforcement, and impact protection where the design provides it. Motorcycle boots should support and cover the ankle, protect the toes, and use a sole that grips pegs and pavement. Coverage and secure construction matter because hands and feet are exposed, and a boot or glove that shifts can leave protection in the wrong place.
For gloves, check that you can close your fingers around the grips and operate the brake and clutch without the material bunching. A loose palm can twist in a slide, while a glove that’s too tight can numb your fingers on a cold ride. Either problem can interfere with control: numbness makes it harder to judge pressure on a lever, and bunching can distract you or restrict movement. Imagine riding through a wet roundabout: a grippy palm and working controls matter more than a flashy knuckle panel you can’t move comfortably.
Boots need a snug heel and secure closures. Try them on with the socks you plan to ride in, then walk and crouch as well as sitting on the bike. Street shoes and casual boots may feel familiar, but they often lack the ankle support, reinforcement, and sole design made for riding. A boot that laces loosely can also snag or come undone, so tuck laces away and fasten straps properly. The aim is a secure fit that supports the foot without making it difficult to shift or use the rear brake.
Weather changes the details. Waterproof gloves and boots help during a cold downpour, but they can feel hot in summer; ventilated options breathe better yet may offer less rain protection. Consider the conditions you ride in most often and whether you can carry a compact backup for the occasional change. If your route starts dry and ends in drizzle, pack compact rain layers rather than assuming a waterproof label will keep every seam and closure dry forever. Inspect gloves for worn palms and boots for damaged soles, because grip and secure construction are part of control.
motorcycle riding gloves with grip
As an affiliate, we earn on qualifying purchases.
As an affiliate, we earn on qualifying purchases.
Match your gear to the forecast without sacrificing protection
Layering lets you adapt motorcycle gear to heat, cold, and rain while keeping protective garments in their proper position. Start with the riding jacket and pants that fit over your base layers, then add thermal insulation or rain protection as conditions call for it. A weather forecast is a starting point, not a promise: a shaded mountain pass can feel very different from a sunny city street. The practical goal is to adjust comfort without loosening the outer gear or displacing its armor, since warmth is not a worthwhile trade if protective coverage shifts.
In hot weather, choose ventilation and moisture-managing layers, and take breaks before heat dulls your concentration. Mesh gear can move air across your body, but it still needs abrasion-resistant zones and armor. More airflow can make a ride feel manageable, while too little can lead to overheating and reduced focus; the answer is protective gear designed for airflow, not bare skin. For example, a rider leaving for a warm afternoon ride might pack a lightweight waterproof shell; an unexpected storm is much easier to handle when you can pull over and suit up than when you’re shivering at speed.
Cold-weather layers work best when they trap warmth without making your gloves or jacket restrictive. A thin thermal layer under a fitted jacket often works better than a bulky sweatshirt that pushes elbow armor out of position. Waterproof membranes can keep rain out while allowing some moisture to escape, though heavy exertion and humidity can still leave you damp. If your hands become cold enough to lose dexterity, operating controls can become harder, so plan for the conditions rather than relying on discomfort as a reason to cut a ride short.
Visibility belongs in your weather plan, too. Bright colors and reflective details can help drivers spot you in rain, dusk, or a tunnel exit, where a dark jacket can disappear against the background. Think of reflective trim as a small signal flare sewn into your gear. It cannot replace defensive riding, and visibility depends on light and angle, but additional contrast gives other road users another chance to notice you. Consider reflective details especially if you regularly ride at dawn, after dark, or in poor weather.
sturdy motorcycle boots with ankle protection
As an affiliate, we earn on qualifying purchases.
As an affiliate, we earn on qualifying purchases.
Buy your first kit in this order, then check every fit
Build your first riding kit in protection-first order: helmet, jacket and pants, gloves, then boots. This sequence gives you a complete baseline before you spend on convenience features such as Bluetooth audio or custom graphics. It is not a ranking of which body parts matter; it is a way to get the essential pieces sorted before optional extras. You do not need the most expensive gear on the rack; you need equipment that fits, suits your riding, and you will wear every time.
- Choose a certified helmet. Try several models and sizes, check for even pressure, and confirm that the visor and strap work for you.
- Try jacket and pants together. Sit in your riding posture and confirm the armor stays over your elbows, shoulders, knees, and hips.
- Test gloves at the controls. Grip an imaginary handlebar and check that you can operate levers without bunching or slipping.
- Walk and crouch in boots. Check ankle coverage, secure closures, heel fit, and sole grip.
- Recheck everything at home. Wear the full setup for a short practice ride, then inspect for pressure points, exposed skin, or shifting armor.
Take a friend or ask an experienced shop fitter to help, especially if you’re unsure about helmet shape. A rider buying online can compare size charts, but head shape and garment cut vary by brand; easy returns matter. If a jacket rides up when you lean forward in the store, it is unlikely to improve after an hour on the road. Trying the full kit together can reveal issues a single item cannot: gloves might conflict with jacket cuffs, or a jacket might pull the pants down when you reach for the bars.
Price is one factor, not a safety rating. Spend first on a correct fit and protective coverage, then compare durability, weather features, and repair or replacement options. If a bargain helmet has no verifiable certification label, save your money for a model with documented compliance. Style is a bonus; comfort is what helps you keep the gear on for the ride home. Think beyond the fitting room, too: gear that suits your usual commute and climate is more likely to be worn consistently than a setup that is protective but impractical for your regular rides.
Keep gear ready by inspecting and replacing it at the right time
Regular inspection catches wear that can weaken riding gear before a crash. After each ride, check closures, seams, armor pockets, glove palms, boot soles, and helmet straps. Wear often develops where gear bends, rubs, or takes repeated strain, so focus on those areas as well as visible tears. A zipper that splits near the waist or armor that has shifted out of its pocket may seem like a small nuisance in the garage, but it can leave a gap when you need coverage.
Clean gear according to its care label. Some textile garments have removable liners; leather may need products made for leather rather than household cleaners. Cleaning methods matter because harsh chemicals or excess heat can damage materials, coatings, or adhesives even when the outside still looks fine. Never assume a hot dryer or harsh solvent is harmless. For example, after a dusty weekend ride, brushing grit from a jacket and letting it air-dry can preserve its fabric better than stuffing it wet in a gear bag.
Replace equipment when it is damaged, no longer fits, or has reached the manufacturer’s recommended service life. Any helmet involved in a crash or significant impact should be replaced, even if you cannot see damage; internal energy-absorbing material may be compromised. With jackets, gloves, and boots, follow the maker’s repair guidance and do not rely on improvised fixes for protective parts. A worn seam or failed closure can reduce coverage at the moment it is needed, so treat repairs as a question of whether the original protective function can be restored—not just whether the item can still be worn.
Technology can add convenience, but it does not replace basic protection. Airbag vests and jackets can provide another layer of impact protection, while Bluetooth systems help riders communicate or hear navigation prompts. These extras bring their own fit, compatibility, charging, and maintenance considerations; if they are not set up or maintained as directed, you may not be able to rely on them when needed. Check fit, compatibility, maintenance requirements, and any activation or charging instructions before relying on a device. Gear is a bit like a tool roll: smart extras are useful, but only after the essentials are in working order.
Frequently Asked Questions
Which motorcycle helmet offers the most coverage?
A full-face helmet covers the head, chin, and face, so it provides more facial coverage than open-face and half helmets. Choose a model with the safety certification required where you ride and a fit that stays secure without painful pressure points.
How often should I replace my motorcycle helmet?
Replace a helmet after a crash or significant impact, even if the outside looks undamaged. For normal use, follow the helmet maker’s service-life and care guidance, and check for recalls through the NHTSA database if you are in the United States.
Is expensive motorcycle gear always safer?
No. Price can reflect materials, comfort features, construction, or brand, but it does not prove that a garment fits you or meets a particular safety standard. Prioritize verified certification where applicable, protective coverage, armor placement, and a fit you can wear for the whole ride.
What should I wear for motorcycle riding in hot weather?
Choose ventilated riding gear with abrasion-resistant panels and correctly placed armor, rather than riding in a T-shirt or casual shorts. Moisture-managing layers and regular breaks can help you handle heat, while a packable rain layer prepares you for sudden weather changes.
How should motorcycle gloves fit?
Gloves should feel snug without cutting off circulation, and the palms should not slide when you grip the handlebars. Test the brake and clutch levers before you ride; if seams bunch or your fingers cannot move freely, try another size or shape.
Conclusion
Buy gear you can wear comfortably on every ride, not just equipment that looks protective on a hanger. Start with a correctly fitted, certified helmet, then build coverage from shoulder to ankle and check that every piece stays put when you sit on your bike.
Before your next ride, take two minutes to inspect your kit and adjust anything that shifts or pinches. The best gear is the gear you reach for before the engine fires—and still feel good wearing when the road bends toward home.
Fall Picks
fall essentials
As an affiliate, we earn on qualifying purchases.