TL;DR
Motorcycle riding gear helps reduce injuries from impact, abrasion, weather, and road debris, but it cannot prevent every injury. Start with a correctly fitted, certified helmet, then cover your hands, feet, joints, and body with motorcycle-specific gear that stays in place while you ride. Choose protection you can wear comfortably on your real routes, inspect it regularly, and replace it after damage according to the maker’s guidance.
A slide across rough pavement can turn a short ride into a long recovery. The right motorcycle riding gear can reduce harm from impact and abrasion, but no jacket, helmet, or airbag can make a crash harmless. Your best setup covers you from head to toe and stays put when the ride gets uncomfortable or the road gets rough.

Get business pricing on garage and car supplies
- Business-only prices and quantity discounts
- Tax-exempt purchasing
- Multiple users, one account, clear invoices
This guide walks you through the gear that matters, how to judge fit and safety labels, and how to build a practical kit for your commute or weekend route. You’ll also get a buying sequence you can use at the shop: sit in your riding position, check the armor, and make sure your hands and feet still work the controls. The aim is simple: protection you’ll wear every time you ride.
Buy a certified, correctly fitted helmet and replace it after a significant impact according to the manufacturer’s guidance.
Choose motorcycle-specific clothing with protective construction and armor that stays over your joints in riding position.
Cover your wrists, hands, feet, and ankles; test gloves and boots on the controls before buying.
Pick ventilation, waterproofing, insulation, and reflective details to match your route and climate.
Inspect seams, closures, armor, and shells regularly, and follow care and replacement instructions.
Why a complete gear setup protects more than your head
Motorcycle riding gear helps reduce injuries by covering you against impact, abrasion, weather, and debris. A helmet protects your head, while clothing, gloves, boots, and eye protection cover the rest of the rider who still has to steer, shift, and brake. Gear cannot prevent every injury, and its performance depends on fit, construction, the crash, and whether it stays in place.
Think of a kit as a chain of coverage: an uncovered ankle or bare hand can meet the pavement even when your jacket and helmet are excellent. On a rainy commute, for example, a visor full of road spray can make it harder to see the car braking ahead. Eye protection and weather layers help you keep attention on traffic, while protective construction addresses a different risk.
A common mistake is treating comfort as a luxury. If your jacket rides up when you reach for the bars, or your gloves make the levers hard to feel, you may leave them at home or lose control precision. Fit is part of practical protection: the gear has to work with your body and your motorcycle.
Gear reduces risk; it does not erase it. Choose coverage you can wear on ordinary rides, not just the occasional long trip.
Products Worth Considering

NOCO Boost GBX45 1250A 12V Lithium Jump Starter

DEWALT 20V MAX XR Hammer Drill and Impact Driver Combo Kit with Two 4Ah Batteries and Charger (DCK250QQ2)

Vantrue Power JS3 3250A Car Jump Starter with 160 PSI Air Compressor
As an affiliate, we earn on qualifying purchases.
Choose a helmet that fits your head and your riding
Motorcycle riding gear starts with a properly fitted helmet that meets a safety standard recognized where you ride. In the United States, check for DOT compliance; in many other markets, ECE 22.06 is a current standard. A full-face helmet generally covers more of your head and face than an open-face design, though your fit and local rules matter too.
ECE 22.06 introduced more demanding testing than its predecessor, including additional impact scenarios and attention to rotational forces. That does not mean any helmet eliminates rotational injury risk. Certification tells you the helmet met a defined standard; it does not promise a crash-proof outcome or make every model equally comfortable.
Try a helmet on for several minutes. It should feel snug all around without sharp pressure points, and it should not roll freely when you gently move it. Imagine a Saturday shop visit: one model feels plush at first, but after ten minutes it pinches your forehead. The next size or shape may be the better choice, even if the paint is less flashy.
Replace a helmet after a significant impact, even when the shell looks fine, and follow the maker’s guidance on age and replacement. If you live in the U.S., check NHTSA recall notices and manufacturer information for your exact model before buying or riding with it.
Cover your joints, hands, and ankles with gear built for riding
Motorcycle-specific jackets and pants use protective construction such as abrasion-resistant materials, reinforced seams, and armor at likely impact points. Leather and textile can both work; the label alone does not settle the question. Look at construction, fit, and product documentation, including clothing certification such as EN 17092 where applicable.
Armor complements the garment’s abrasion resistance. In Europe, EN 1621 standards cover motorcycle protectors, and the level and type indicate different performance characteristics. Check that shoulder, elbow, hip, and knee protectors sit over the joints in your riding stance. If knee armor slides down when you bend your legs, it may miss the spot it is meant to cover.
Gloves protect your hands from abrasion and help you keep a steady grip. Pick a snug pair that covers the wrists and lets you fully operate the clutch, brake, and switches. Boots should protect the foot and ankle, stay fastened, and provide a stable sole; sturdy work shoes that leave the ankle exposed offer less coverage. For example, try shifting into first gear while standing in the shop. If a stiff boot makes the motion awkward, test another pair before you commit.
Riding jeans and casual-looking sneakers vary widely in protection. Check certification and construction instead of assuming a denim appearance or marketing phrase means the garment will stay intact in a slide.
Use this four-step fitting check before you buy
Motorcycle riding gear fits best when you check it in a riding position, with armor over your joints and enough freedom to control the bike. A fitting room mirror can show the color, but it won’t tell you whether the jacket creeps up when you lean forward. Run this quick check before you buy:
- Wear your riding layers. Bring the base layer or sweatshirt you actually use, then fasten every zipper, snap, and strap.
- Take your riding position. Bend your elbows, reach for imaginary bars, crouch slightly, and sit as you would on your bike.
- Check coverage and movement. Confirm armor stays over elbows and knees, the jacket does not pull away from your wrists, and pants do not expose your lower back.
- Operate the controls. Close your fingers around imaginary grips and work your feet as if shifting and braking. Nothing should bind or slip.
A rider who buys online can use the same sequence at home before removing tags, while following the store’s return rules. If a jacket feels perfect standing upright but exposes your wrists when you reach forward, its cut may not suit your motorcycle. Try another model or size rather than hoping the problem disappears on the road.
This check also helps you budget sensibly. Build a complete setup over time if needed, but don’t spend the whole budget on a premium helmet and ride with bare hands or exposed ankles. Prioritize coverage across your body, then add features that match your routes.
Match visibility and weather layers to your daily route
Visibility and weather features make gear easier to use and can help other road users notice you, but they do not replace protective construction. Bright colors and reflective details can stand out in rain or at dusk. A waterproof shell and thermal liner can make a cold ride more manageable, while vents help move air through a jacket on hot days. These choices involve tradeoffs: waterproof membranes may reduce airflow, extra insulation can overheat you when the temperature rises, and open vents are less useful in heavy rain. Removable layers give you more flexibility, though they add pieces to carry and manage.
Picture a rider leaving work at 5 p.m. in October: the trip starts in warm afternoon sun and ends in low light with a chill in the air. A removable liner and reflective panels adapt better than a thick winter jacket worn all day. The practical test is whether you can adjust without losing focus or leaving important areas uncovered. For night riding, use a clear visor or suitable low-light eye protection; dark lenses can cut visibility when the light fades.
Eye protection is more than comfort. Wind, dust, insects, and road debris can make you blink or look away at the wrong moment, interrupting your view of traffic just when you need it. Keep your visor clean, and check that it seals and opens easily with your gloves on. On a gravel-strewn back road, a smudged visor can turn oncoming headlights into a hazy glare. A tinted visor may reduce daytime glare, but it is a poor choice if the ride continues after dark unless you can switch to a clear one.
Airbag garments add another option. Tethered and electronic systems vary in coverage, activation, maintenance, cost, and compatibility, so read the product guidance carefully. Their value depends partly on whether the system suits your riding, whether you will wear it consistently, and whether you can keep up with servicing and any replacement costs after deployment. They can add protection around the torso and neck area, but they do not replace a helmet, armor, or abrasion-resistant clothing.
Keep your gear dependable with simple checks and care
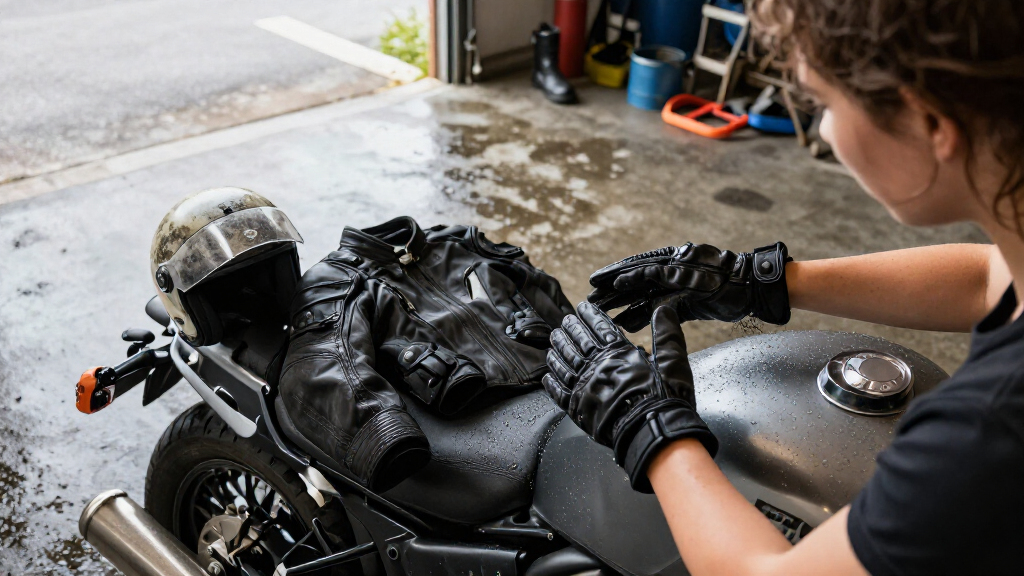
Regular inspection and care help you spot worn seams, damaged closures, cracked armor, or a compromised shell before your next ride. Look over high-stress areas such as knees, elbows, seat panels, glove palms, and boot fasteners. A jacket may look fine from across the garage while a cuff zipper quietly fails to hold the glove in place.
Follow the maker’s cleaning instructions. Harsh detergents, high heat, or unauthorized alterations can damage materials or protective components, including waterproof membranes and armor pockets. If your textile jacket says to remove armor before washing, do that; if your leather needs a specific cleaner, don’t soak it in a tub of household soap.
After a fall or crash, check each item against its manufacturer’s replacement guidance. Replace damaged equipment, and follow the helmet maker’s advice after an impact even if the shell has no visible crack. Airbag equipment has its own inspection, service, and post-deployment rules, so check those before assuming a used unit is ready.
Make a quick monthly check part of your routine, especially if you commute daily. Before a Sunday ride, run your fingers along jacket seams, test glove closures, and confirm your visor is clean and scratch-free. Ten minutes in the garage beats discovering a broken strap at a fuel stop.
Frequently Asked Questions
What motorcycle gear should a beginner buy first?
Start with a correctly fitted, certified helmet, then budget for a motorcycle jacket and pants, gloves, boots, and eye protection. A complete set with sound fit gives you coverage across your body instead of leaving hands or ankles exposed.
Is a full-face helmet safer than an open-face helmet?
A full-face helmet generally covers more of your head and face than an open-face design. Fit and recognized certification still matter, so try different models and check the standards required where you ride.
How can I tell whether a helmet fits correctly?
A helmet should feel snug all around without sharp pressure points, and it should not roll freely when you gently move it. Wear it for several minutes in the shop; a pinch or hot spot that grows over time is a reason to try another shape or size.
Is leather safer than textile riding gear?
The material name alone does not tell you how protective a garment is. Compare its construction, reinforced seams, fit, armor placement, and certification; choose the option that suits your riding and that you will wear consistently.
Are motorcycle jeans and riding sneakers protective enough?
Protection varies widely between products that look like everyday clothing. Check for motorcycle-specific construction and certification, and remember that sneakers leaving the ankle exposed provide less coverage than purpose-built riding boots.
Can I wash motorcycle gear at home?
Often, but follow the garment maker’s care instructions. Some items require armor removal or special cleaning, and harsh detergent or high heat can damage protective materials and waterproof layers.
Conclusion
Build your kit around coverage, fit, and certification, then choose weather and visibility features for the rides you actually make. Try everything in riding position, check the labels, and make sure your hands and feet still move freely on the controls.
Motorcycle gear helps reduce injuries from a crash; it cannot prevent every injury. Wear the gear before the engine starts, and let that bright visor catch the morning light as you head out.